Replacing Wall Outlet in your home may seem like a straightforward task Do you need a licensed electrician to replace an outlet is big question mark , but safety should always be a top priority when working with electricity. In this comprehensive guide, we will explore whether you need a licensed electrician to replace an outlet. We’ll discuss understanding electrical outlets, safety considerations, local regulations, how to replace a standard outlet, when you might not need an electrician, the importance of GFCI outlets, and tips for hiring a licensed electrician.
Table of Contents
Understanding Electrical Outlets
Electrical outlets are the points where electrical devices connect to your home’s wiring. Understanding the basics of these outlets is essential before deciding whether you can replace them yourself.
Safety Considerations
Safety should be paramount when working with electricity. We’ll explore the necessary safety measures and when to seek professional help to ensure your safety.
Local Regulations and Codes
Electrical work is subject to local regulations and building codes. Adhering to these rules is vital for maintaining the integrity of electrical systems and ensuring the safety of occupants.
Big Question Do you Need a Licensed Electrician to Replace an Outlet
Replacing Wall Outlet Standard
For standard outlet replacement, we’ll provide step-by-step instructions on how to safely and efficiently complete this task. We’ll also discuss situations in which you might not need an electrician for this job.
When You Might Not Need an Electrician
There are instances where you can replace an outlet yourself, saving time and money. We’ll highlight these scenarios and provide guidance on when it’s safe to proceed with a DIY approach.
Replacing a GFCI Outlet
Ground Fault Circuit Interrupter (GFCI) outlets are essential for preventing electrical shocks, especially in areas with water exposure. We’ll guide you through the process of replacing a GFCI outlet and explain their significance.
The Importance of GFCI Outlets
Understanding why GFCI outlets are crucial can help you make informed decisions about when to replace them and when to seek professional assistance.
Tips for Hiring a Licensed Electrician
If you decide that hiring a licensed electrician is the best choice, we’ll provide valuable insights into the process. This includes understanding licensing and qualifications, cost considerations, and essential questions to ask potential electricians.
Licensing and Qualifications
Hiring a licensed electrician ensures that the person working on your electrical system is trained and qualified for the job. We’ll detail what to look for in an electrician’s credentials.
Cost Considerations
The cost of hiring an electrician can vary. We’ll provide information to help you budget for your outlet replacement project.
Replacing a GFCI Outlet
Replacing a Ground Fault Circuit Interrupter (GFCI) outlet is a bit more complex than a standard outlet, but it’s still manageable with the right steps. Here’s a guide on how to replace a GFCI outlet safely and effectively:
Materials You’ll Need:
- New GFCI outlet
- Screwdriver
- Wire stripper
- Wire nuts
- Needle-nose pliers
- Voltage tester
- Electrical tape
- Work gloves
- Step-by-Step Guide:
Safety First:
Begin by turning off the power to the GFCI outlet at the circuit breaker. Double-check with a voltage tester to ensure there’s no electricity flowing.
Remove the Cover Plate:
Use a screwdriver to remove the cover plate from the GFCI outlet, exposing the outlet and its wires.
Remove the Outlet:
Unscrew the GFCI outlet from the electrical box, carefully pulling it out without touching any wires.
Test the Wires:
Use a voltage tester to make sure the wires are not live. It’s essential to confirm there’s no electricity before proceeding.
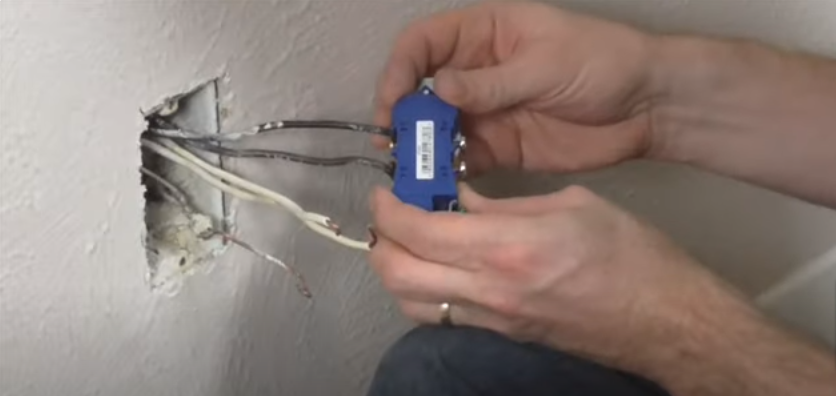
Disconnect the Wires:
Carefully disconnect the wires from the old GFCI outlet. The usual connections are the line wires (coming from the power source) and the load wires (going to other outlets or devices).
Prepare the New GFCI Outlet:
Strip about half an inch of insulation from the end of each wire. The line wires connect to the “LINE” screws, and the load wires connect to the “LOAD” screws on the new GFCI outlet.
Connect the Wires:
Attach the wires to the corresponding screws on the new GFCI outlet. Make sure the connections are secure and the screws are tightened properly.
Double-Check the Connections:
Ensure all connections are tight and no wires are loose. This is crucial for safety.
Fold and Tuck Wires:
Carefully fold the wires back into the electrical box, ensuring they don’t get pinched or damaged during this process.
Screw in the New GFCI Outlet:
Screw the new GFCI outlet into the electrical box, securing it in place.
Reattach the Cover Plate:
Replace the cover plate and screw it back into position.
Turn on the Power:
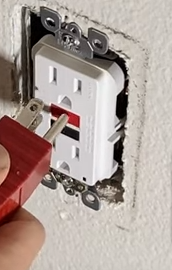
Return to the circuit breaker and switch the power back on to the GFCI outlet. Use the voltage tester once more to confirm that there’s power flowing to the outlet.
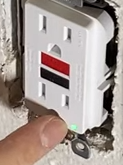
Test the GFCI Outlet:
Press the “TEST” and “RESET” buttons on the GFCI outlet to ensure it’s functioning correctly. The outlet should trip when you press “TEST” and reset when you press “RESET.”
Remember, GFCI outlets are designed for safety, particularly in areas with water exposure. Ensuring that the GFCI outlet is properly installed is critical to maintaining a safe electrical system in your home. If you’re not confident in your electrical skills, it’s advisable to hire a licensed electrician for this task. Your safety should always be the top priority.
Questions to Ask When Hiring an Electrician
Asking the right questions is essential when hiring an electrician. We’ll provide a list of key questions to help you make an informed decision.
- Are You Licensed and Insured?
- Ensure the electrician holds the necessary licenses and has insurance to cover any potential accidents or damages during the job.
- What is Your Experience?
- Inquire about the electrician’s experience, especially in tasks similar to what you need. More experienced electricians often provide higher quality work.
- Can You Provide References?
- Ask for references from past clients. Contacting these references can give you insights into the electrician’s work quality and professionalism.
- What is the Total Cost?
- Request a detailed estimate, including all potential costs like materials, labor, and any additional charges.
- Is This a Flat Fee or Hourly Rate?
- Clarify whether the electrician charges a flat fee for the job or an hourly rate. This helps you understand the cost structure.
- Are Permits Required?
- Check if the project requires permits from local authorities. A licensed electrician can help with this process.
- What is the Warranty on the Work?
- Ask about any warranties or guarantees on the work performed. This provides assurance of quality.
- How Long Will the Job Take?
- Get an estimated timeline for the project, so you can plan accordingly.
- Do You Offer Emergency Services?
- Find out if the electrician provides emergency services for urgent electrical issues.
- What Safety Precautions Will You Take?
- Discuss safety measures, such as turning off the power during work, to ensure your home’s safety.
- Will You Provide a Written Agreement?
- Request a written contract outlining the project details, costs, and a timeline. It’s crucial for your protection.
- Can You Explain the Work in Layman’s Terms?
- A good electrician can explain the work in simple language, ensuring you understand the process.
- Do You Clean Up After the Job?
- Confirm if the electrician will clean up the work area once the project is completed.
- What COVID-19 Safety Measures Do You Follow?
- In today’s environment, ask about any safety measures the electrician follows to protect you and themselves from COVID-19.
- Do You Have Any Questions for Me?
- Give the electrician an opportunity to ask you questions about your needs and any specific requirements you have for the project.
Asking these questions helps ensure that you hire a qualified and reputable electrician for your project. It’s essential to have clear communication and a thorough understanding of the work before proceeding.
Replacing Wall Outlet
Replacing Wall Outlet is a risky job but if you’re considering Replacing Wall Outlet, it’s important to do it safely and effectively. Here are some general steps to guide you through the process:
Special Note: if you’re not comfortable with electrical work or if you have any doubts about your abilities, it’s always a good idea to hire a licensed electrician to perform the replacement. Electrical work can be dangerous, and safety should be the top priority.

Materials You’ll Need:
New electrical outlet (matching the type you’re Replacing Wall Outlet)
- Screwdriver
- Wire stripper
- Wire nuts
- Needle-nose pliers
- Voltage tester
- Electrical tape
- Work gloves
Step-by-Step Guide:
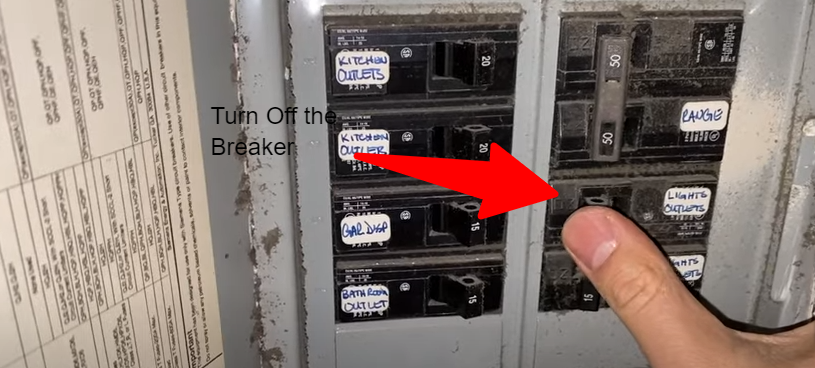
Safety First:
Before you start, turn off the power to the outlet you’re Replacing Wall Outlet at the circuit breaker. Double-check with a voltage tester to ensure there’s no electricity flowing.
Remove the Cover Plate:
Use a screwdriver to remove the cover plate from the outlet. This will expose the outlet and its wires.
Remove the Outlet:
Unscrew the outlet from the electrical box. Carefully pull it out but avoid touching any wires yet.
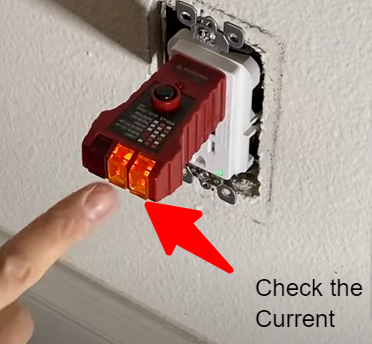
Test the Wires:
Use a voltage tester to make sure the wires are not live. It’s essential to confirm there’s no electricity before proceeding.
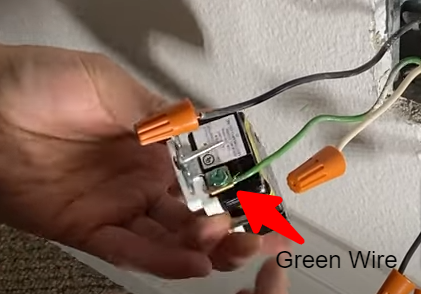
Disconnect the Wires:
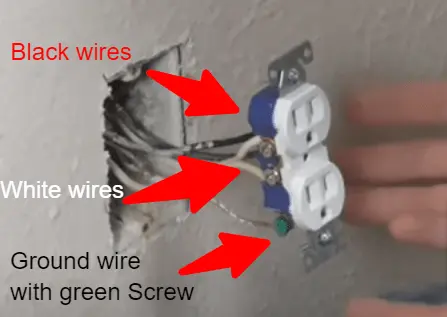
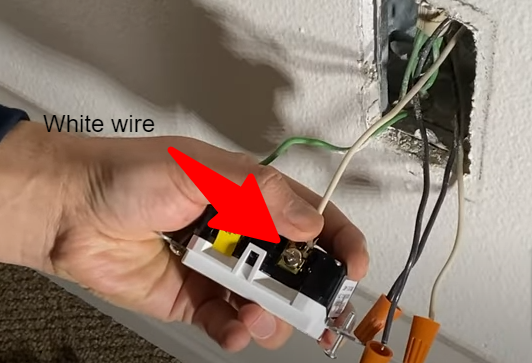
Carefully disconnect the wires from the old outlet. Typically, there are three wires: black (hot), white (neutral), and green or bare (ground). Use needle-nose pliers to help with this.
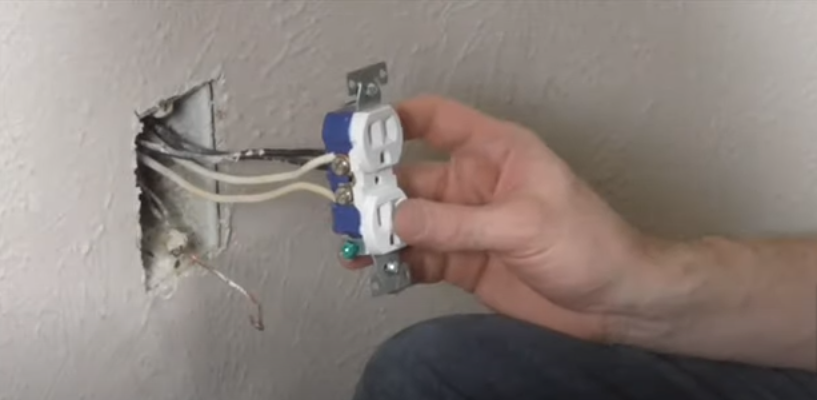
Prepare the New Outlet:
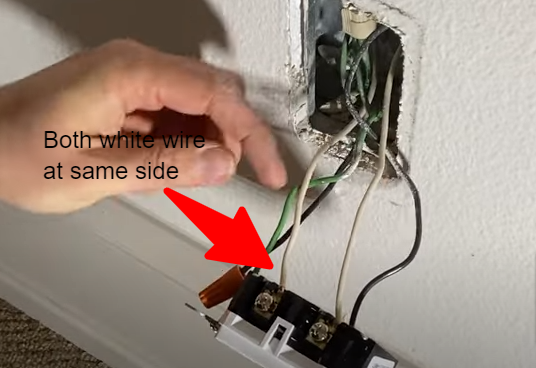
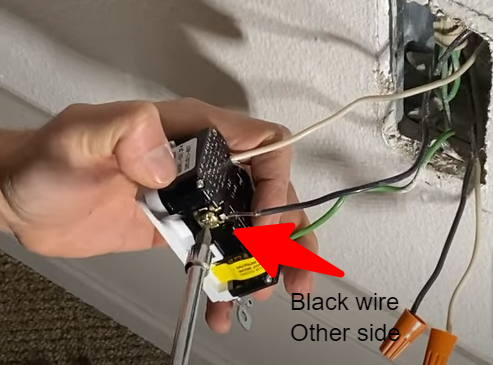
Strip about half an inch of insulation from the end of each wire. The black wire connects to the brass screw, the white wire to the silver screw, and the green or bare wire to the green screw on the new outlet.
Connect the Wires:
Attach the wires to the corresponding screws on the new outlet. Make sure the connections are secure. Tighten the screws.
Double-Check the Connections:
Ensure that all connections are tight and no wires are loose. This is crucial for safety.
Fold and Tuck Wires:
Carefully fold the wires back into the electrical box, making sure not to pinch or damage any wires during this process.
Screw in the New Outlet:
Screw the new outlet into the electrical box, securing it in place.
Reattach the Cover Plate:
Replace the cover plate and screw it back into position.
Turn on the Power:
Return to the circuit breaker and switch the power back on to the outlet. Use the voltage tester once more to confirm that there’s power flowing to the outlet.
Test the Outlet:
Plug in a device or use the voltage tester to ensure the outlet is functioning correctly.
Remember if you have any doubt about it do hire a electrician
FAQs
Can I replace an outlet myself if I have no electrical experience?
When is it absolutely necessary to hire a licensed electrician?
Are there any benefits to hiring a professional even for standard outlet replacement?
What is the average cost of hiring an electrician for outlet replacement?
How can I check if an electrician is properly licensed?
Conclusion
In conclusion, the safety of your home and the proper functioning of your electrical outlets should be a top priority. Understanding the circumstances in which you need a licensed electrician to replace an outlet is crucial. By following the guidelines in this article, you can make informed decisions about your electrical projects.


Leave a Reply